I recently shared a bunch of mood boards for our nursery! It was so much fun brainstorming all of the possibilities for the room, and it really helped me explore what was out there and discover what my tastes were.
It’s a little weird to think that this room will be someone else’s soon—someone I haven’t even met yet!—and that in a few years, it will totally morph as that little someone starts expressing their own tastes and interests.
But for now, the room is how I’m introducing the baby to their world, and I want to make that introduction as amazing as possible.
In my next post, I’ll show the room reveal, but in this one I just want to talk about my initial ideas for it!
The Blank Slate
Here’s what we started out with, once we emptied out all of the guest room furniture. It’s hard to tell here, but the wall was actually a very light blueish grey. There are technically curtain rods on all of the three windows, but only one had a functional set of curtain hardware—there’s a tension rod in one window and in the last, the curtain is hooked into defunct hardware, and the curtain rod isn’t attached to anything, it’s just hanging in the curtain!
The one nursery item in this picture is the rug (the Sima Abalone from Ruggable in 8x10’ with the cushioned pad), which Chase bought for me for Valentine’s Day. We laid it out for a little over a day before rolling it back up for painting!
I think one thing that’s apparent in this picture, however, is how much natural light this room gets. It’s truly beautiful, especially in the afternoon when golden light dances through the trees outside the windows.
The Walls
One thing I knew I wanted in this room was a wall design—whether it be wallpaper or a mural or a stencil. I keep talking about it, but I really wanted this room to feel like a place for a child to let their imagination run wild. Here are some of the walls that really inspired me:


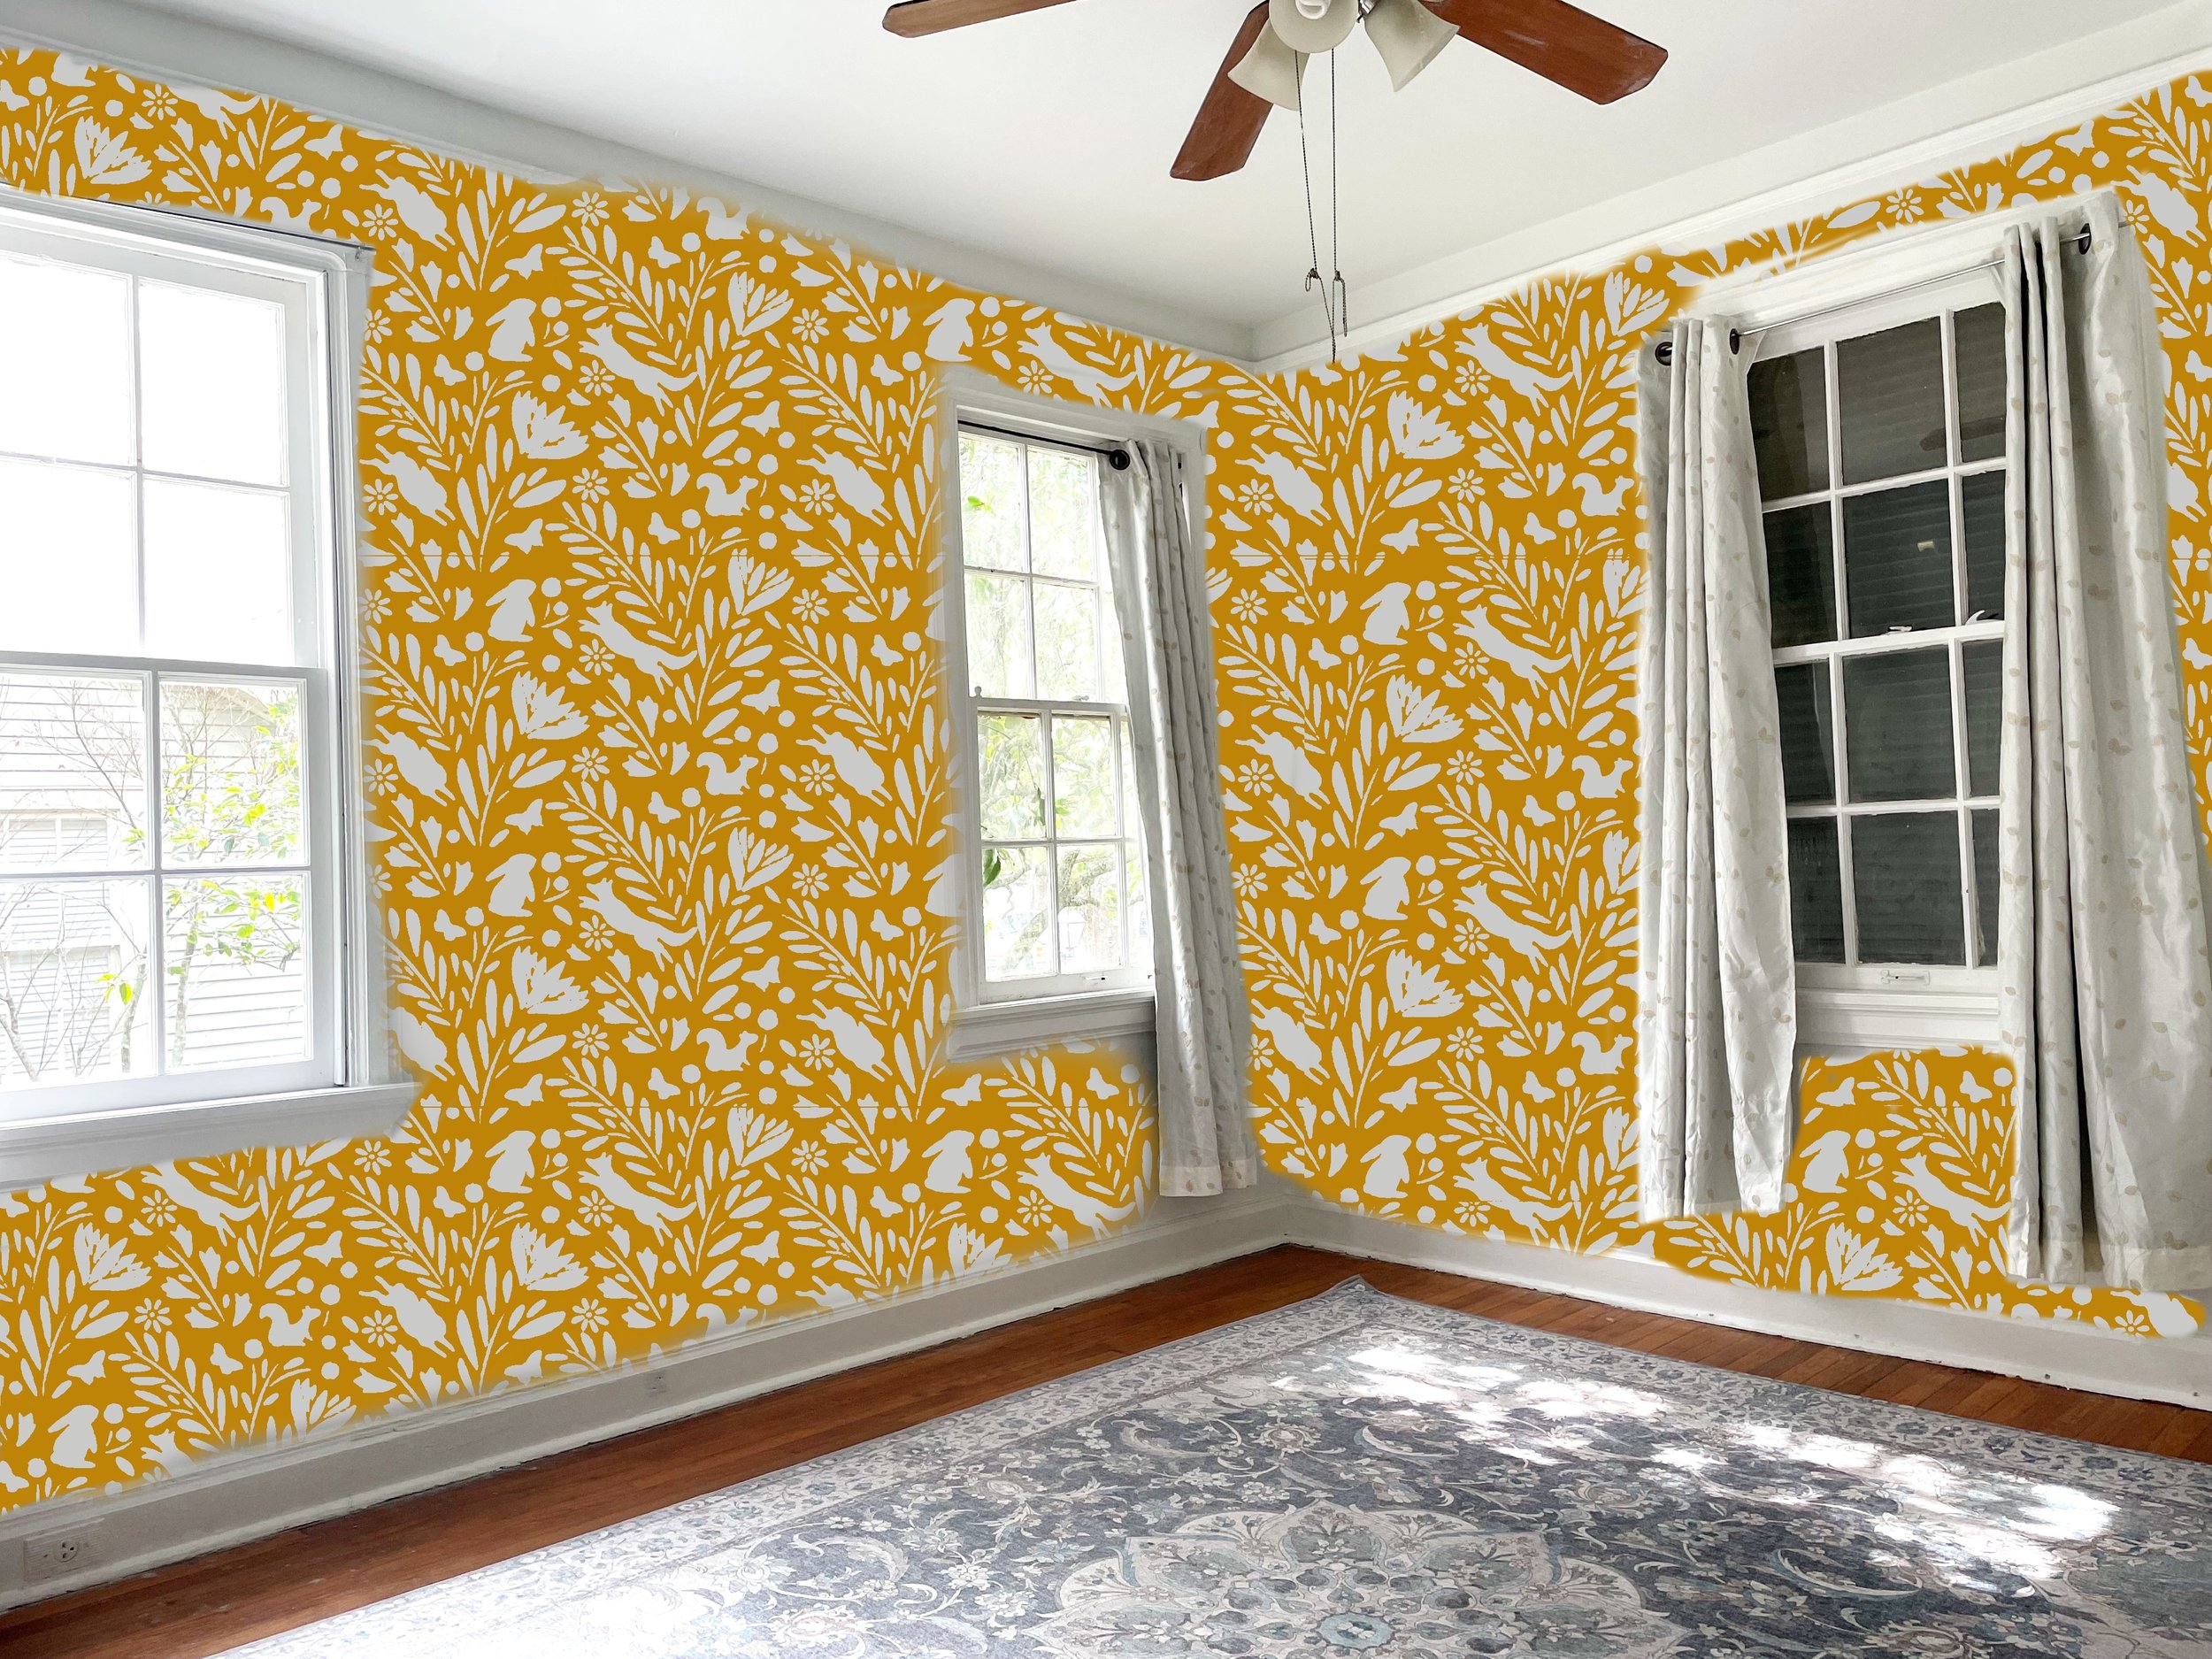
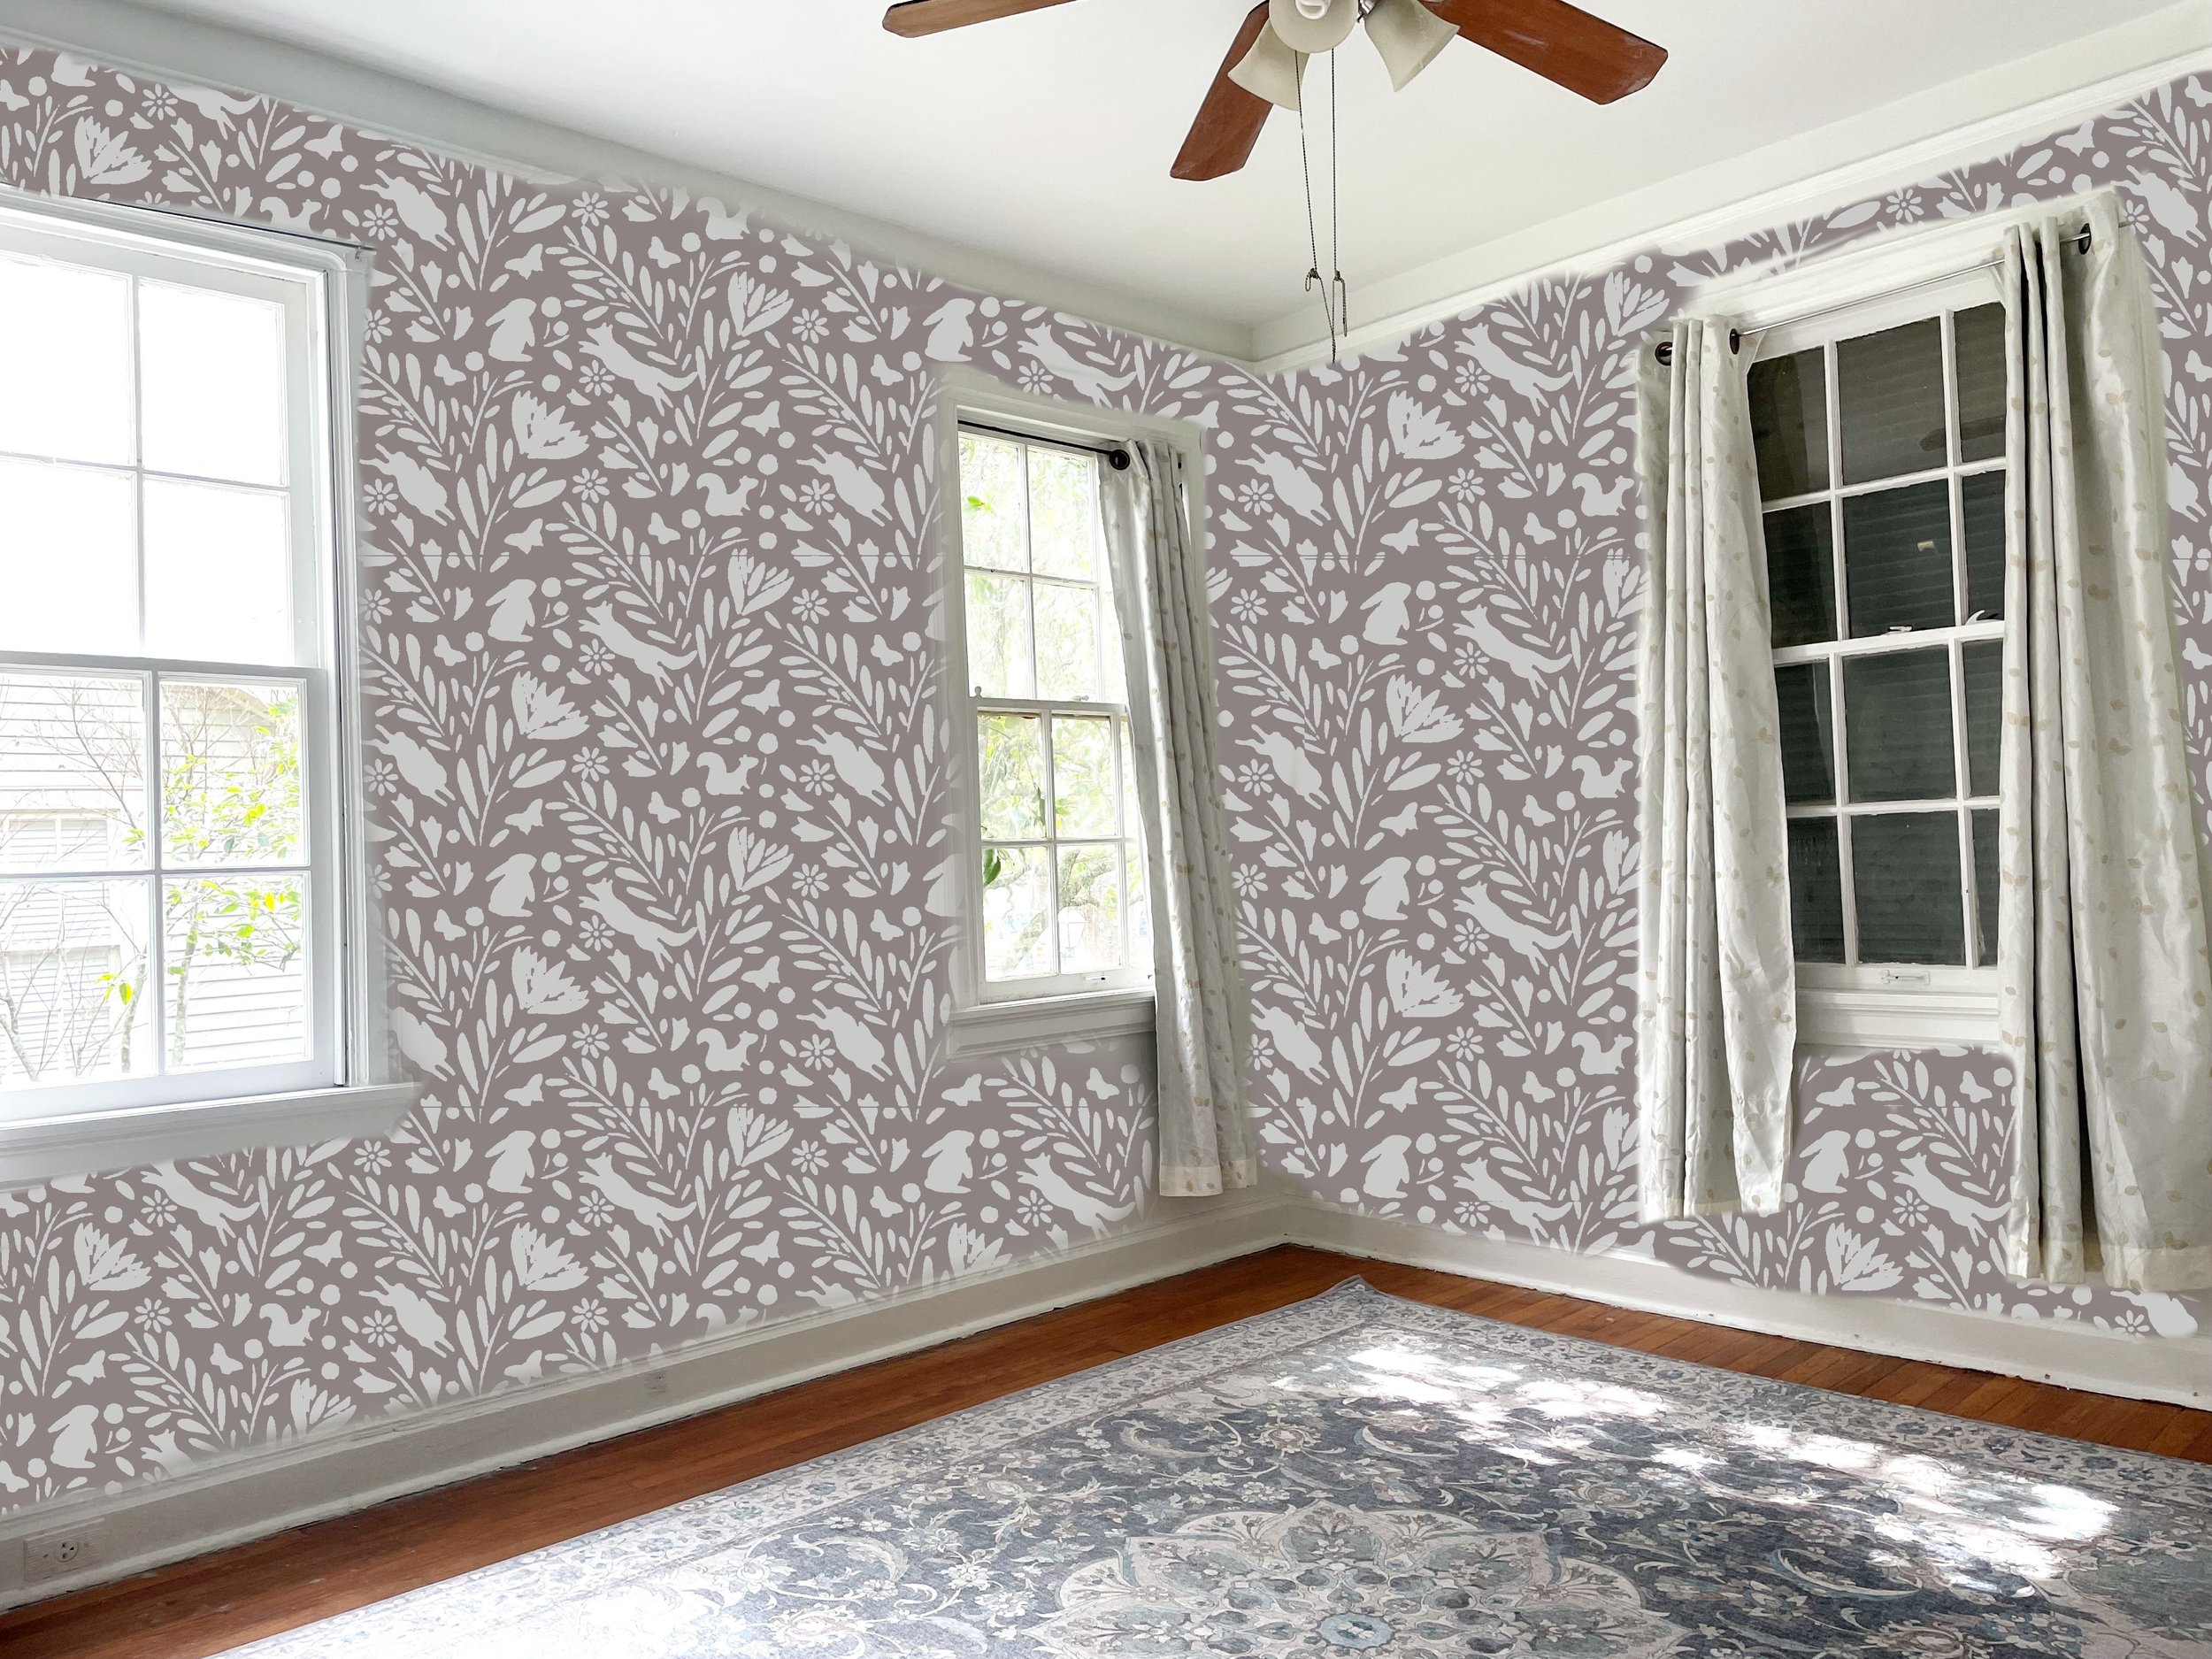
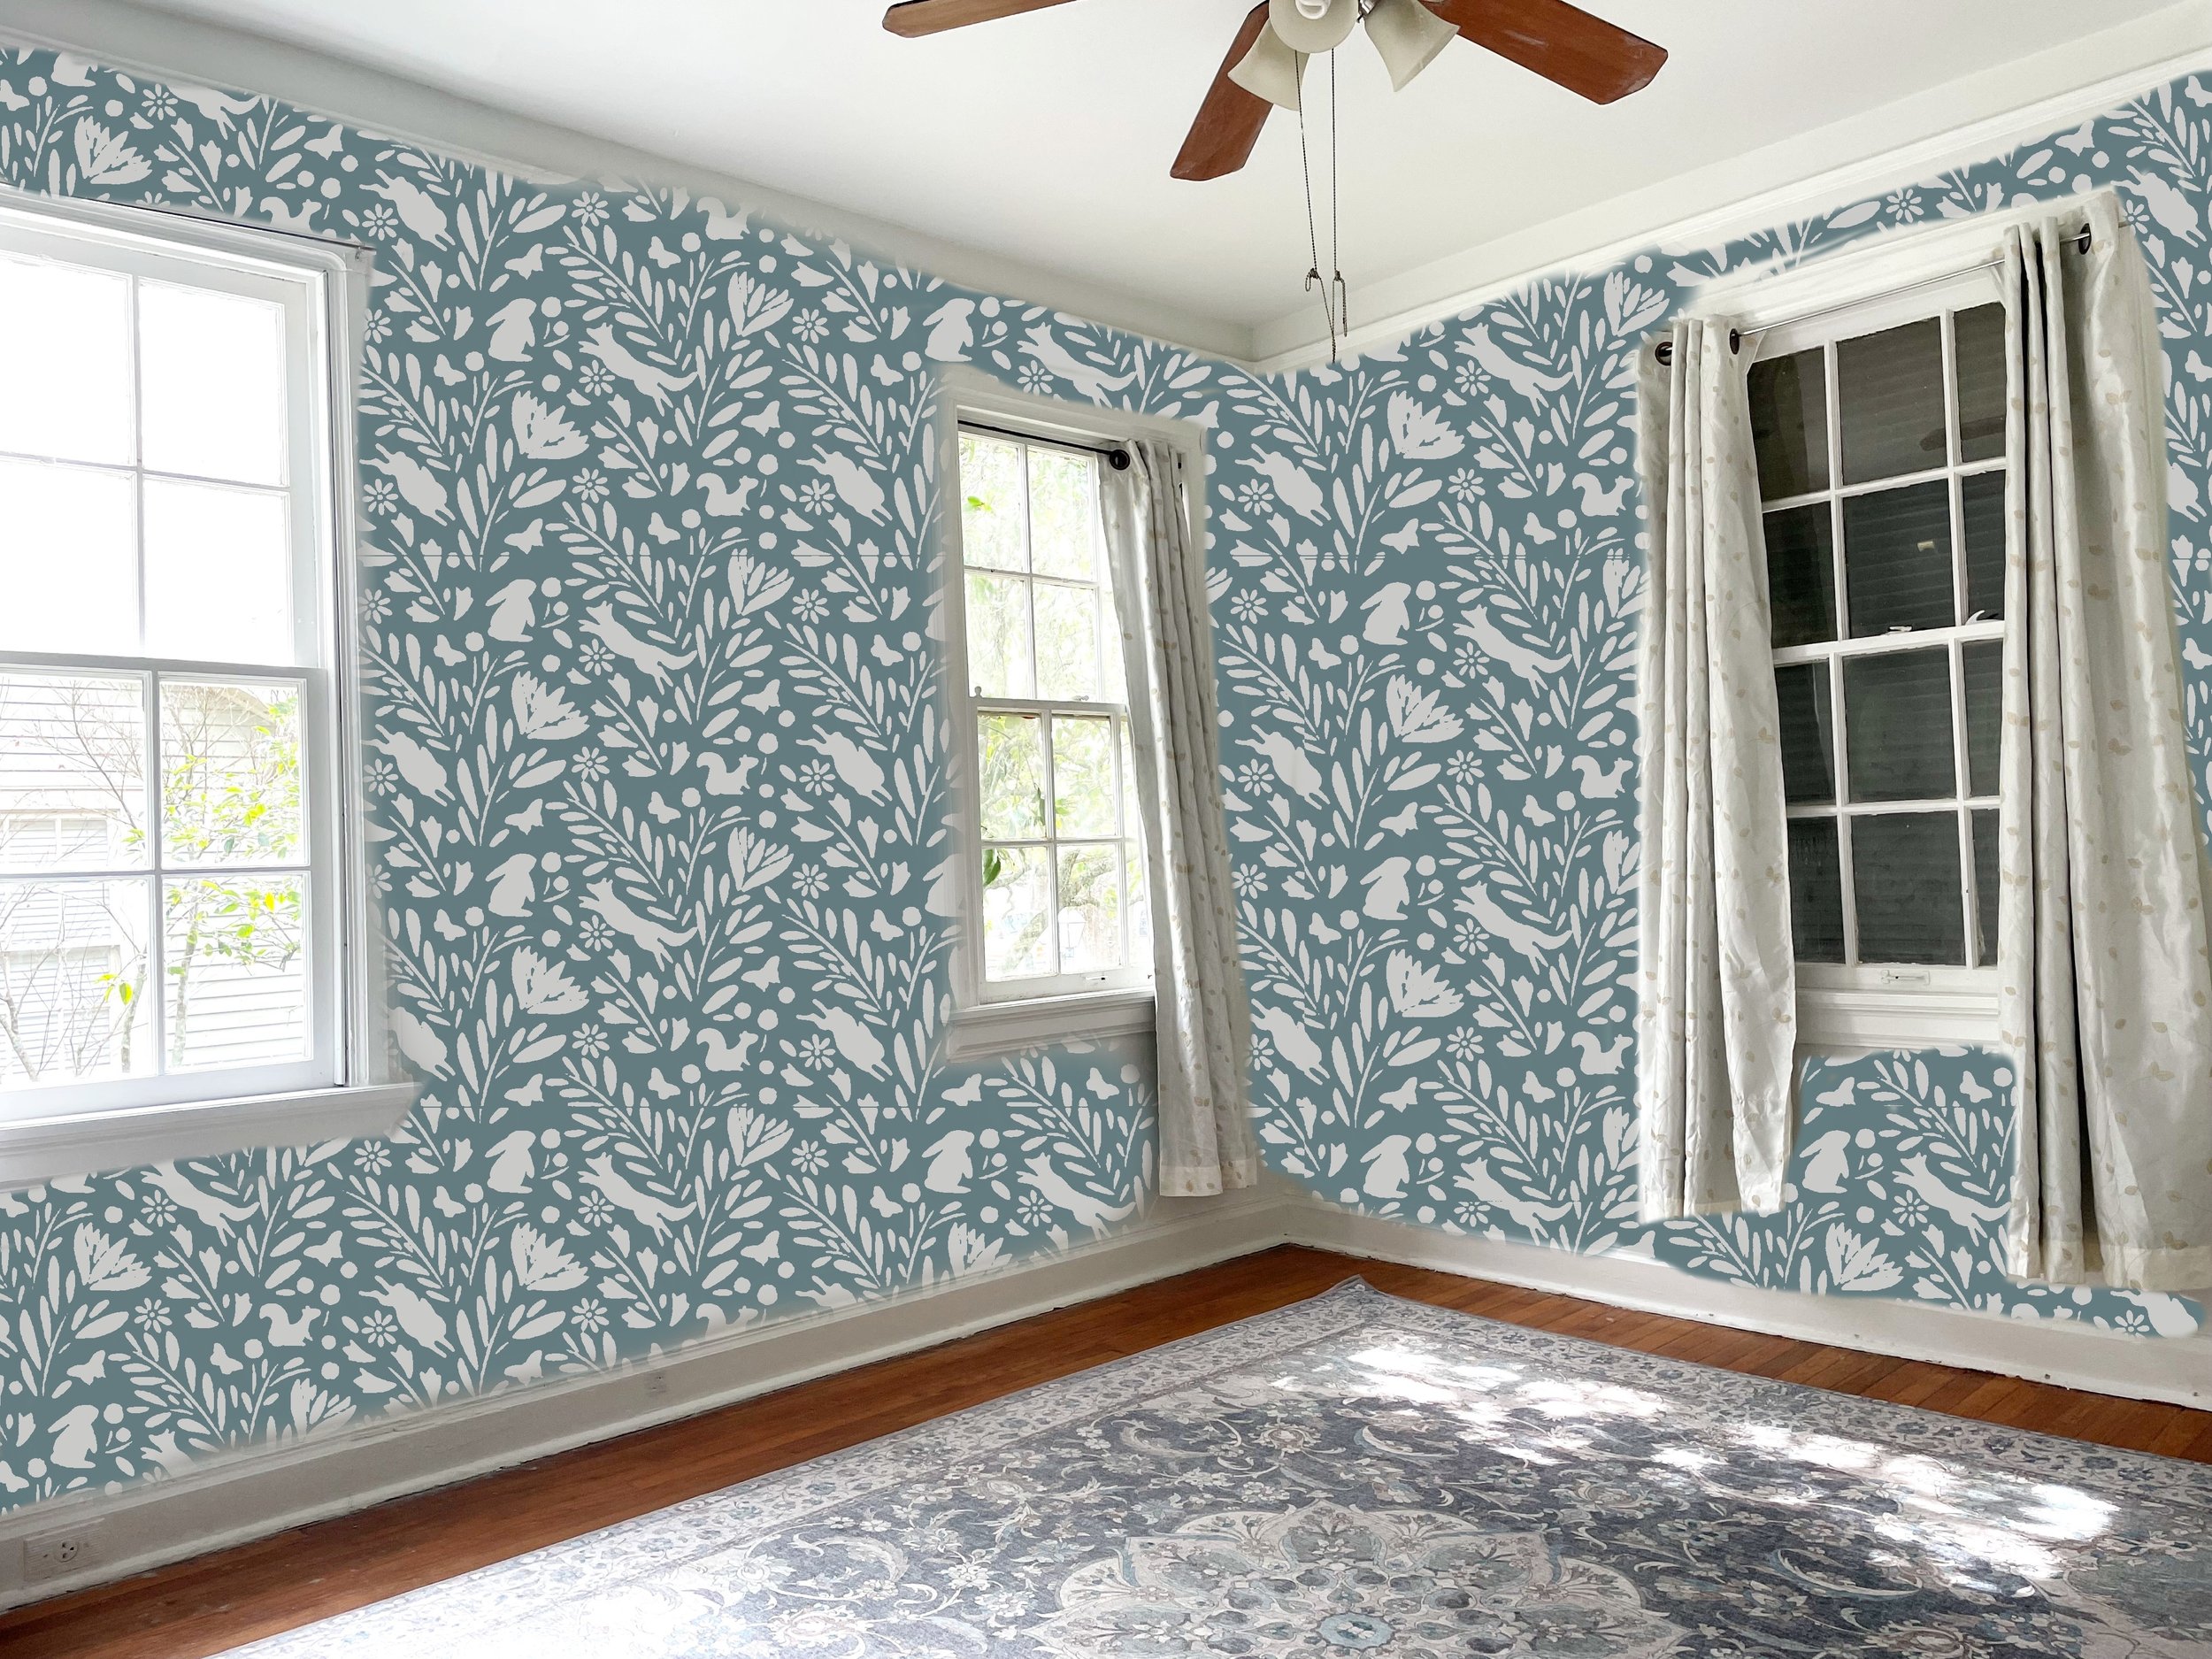
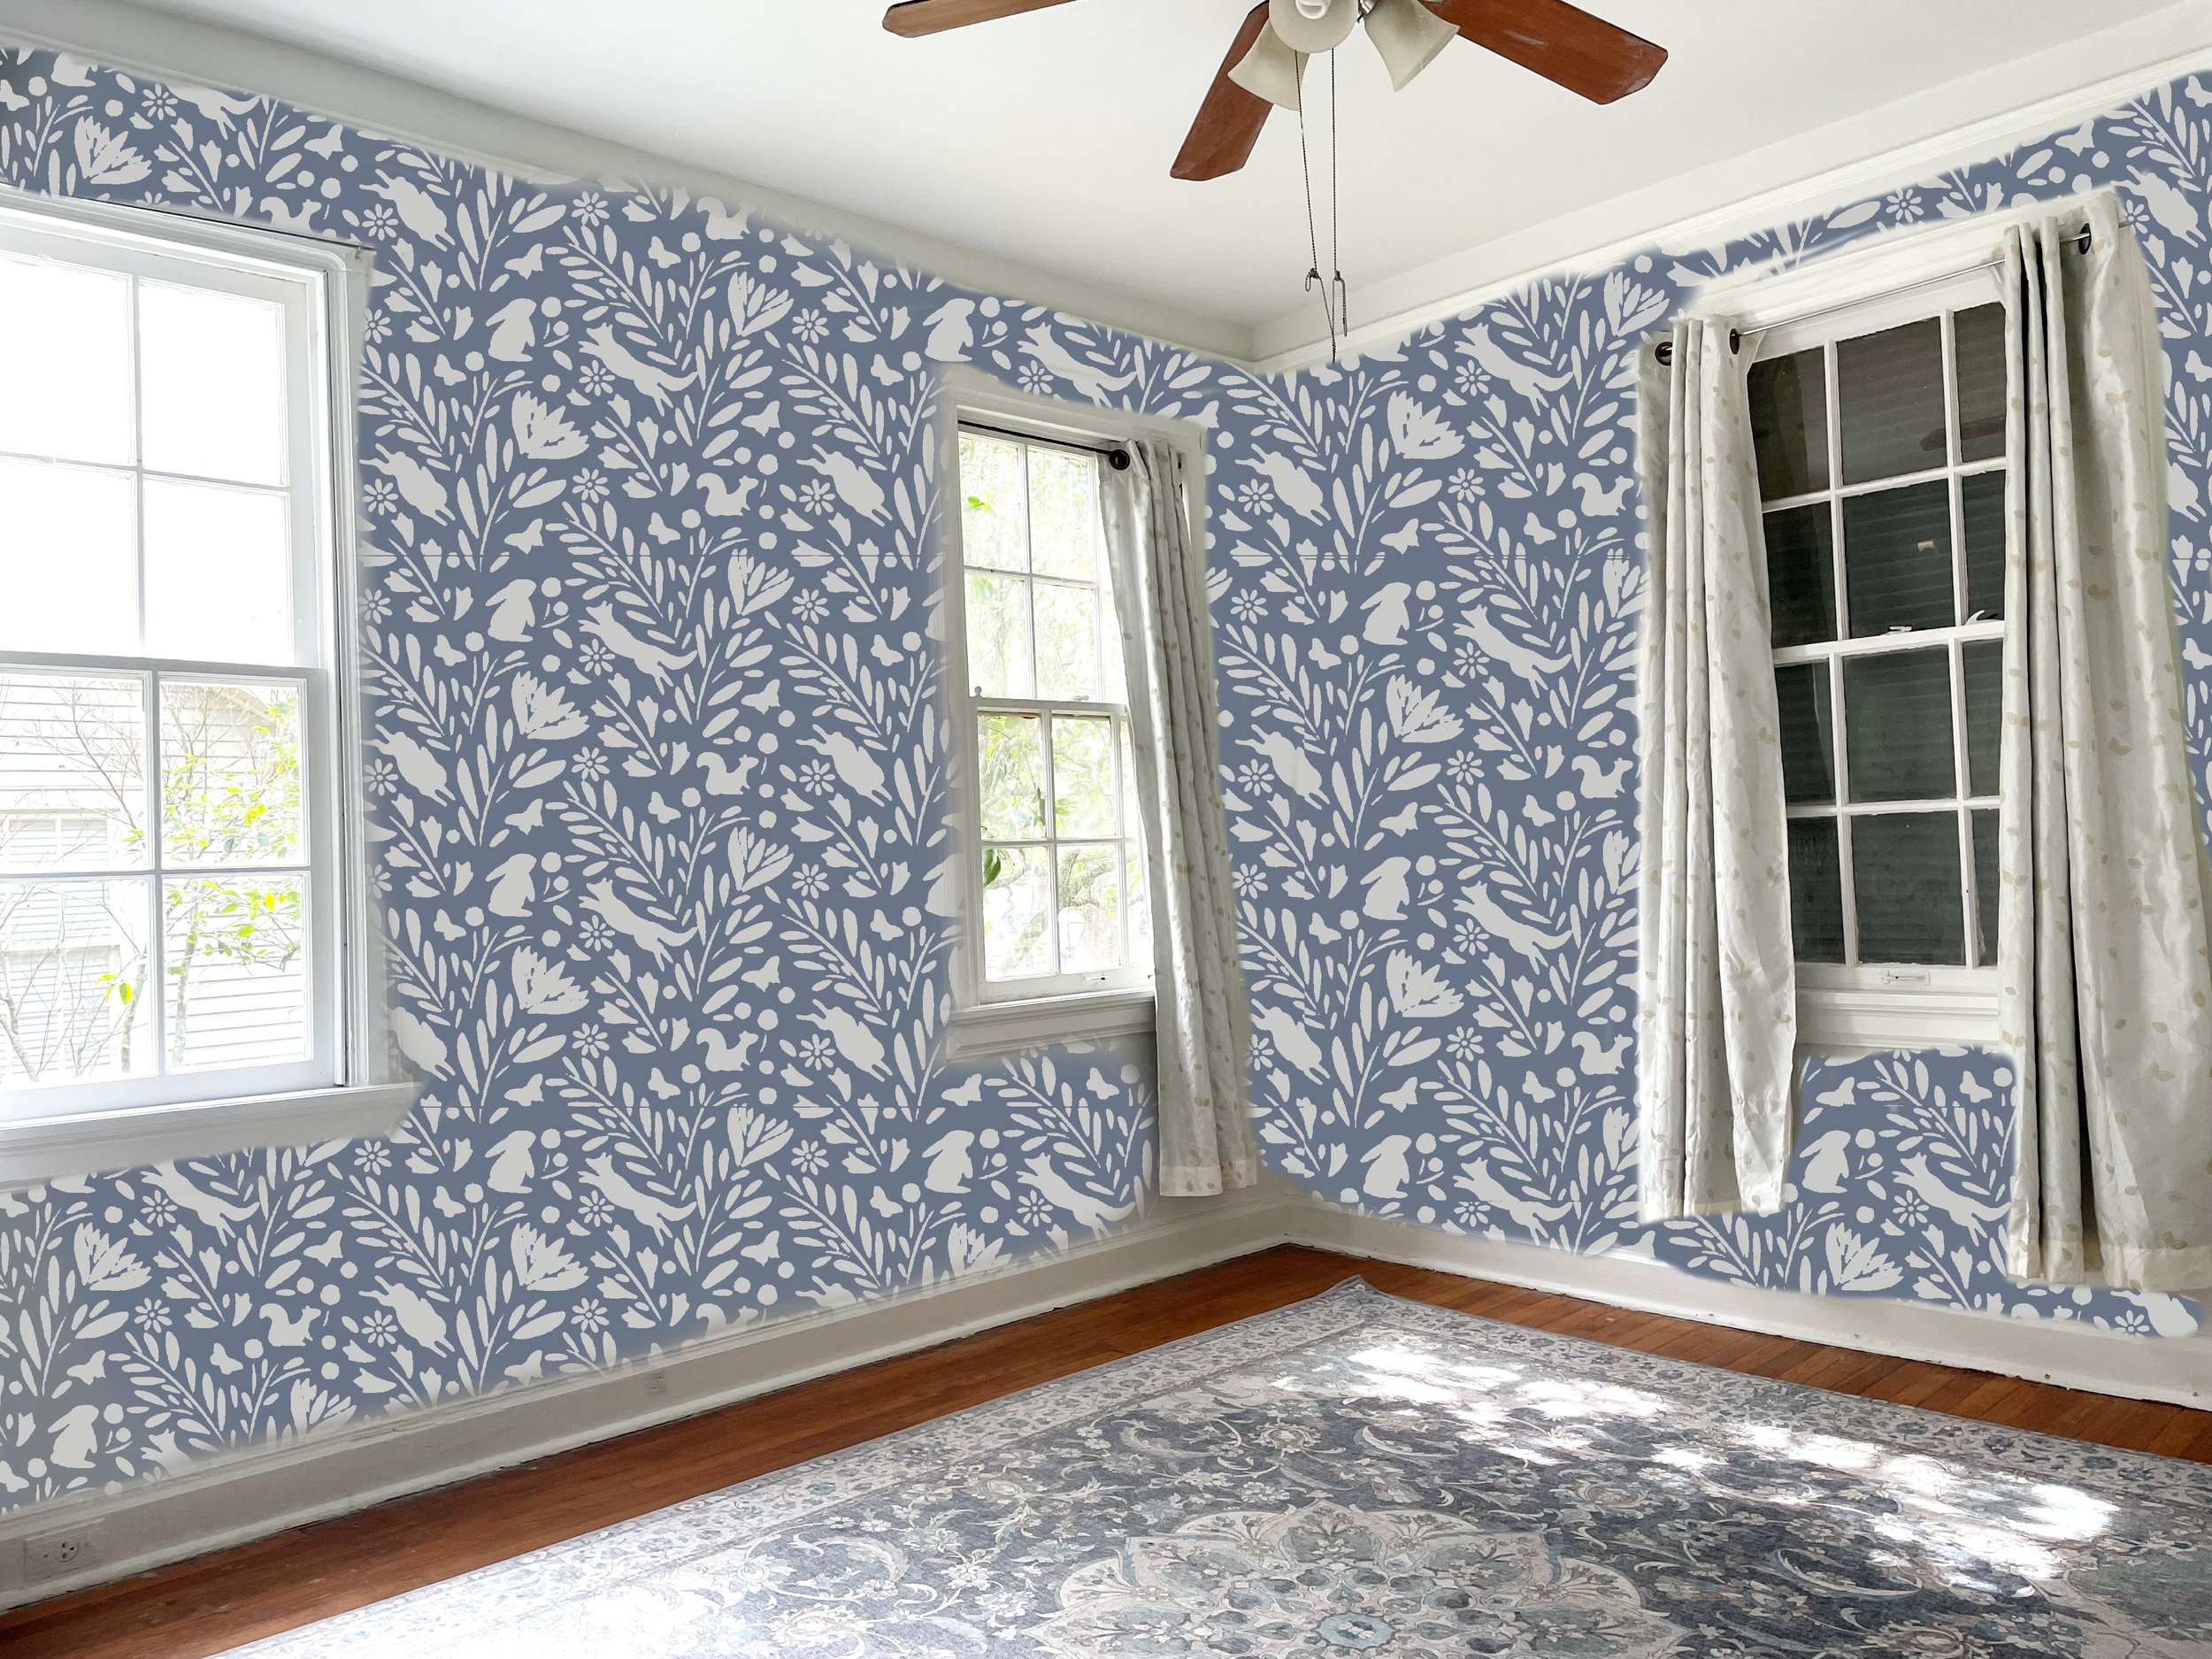
In the end, I decided to apply a wallpaper-look stencil to the walls. Stamping or stenciling a wall is something I’ve been wanting to try for a few years, and I thought it would probably be more durable, easier to fix, and cheaper than wallpaper, and easier to execute than a mural. I noticed a lot of the wallpapers I was drawn to had both animals and florals, so I tried finding stencils that included those features.
These were the finalists:


In the end, I decided the last stencil “Forest Pattern” by StencilRevolution was the one that best fit the vibe I was going for. I loved the animals featured and the flowers. If I had a ton of time and energy, or if I was only stenciling a small area, I might have stenciled the elements in different colors, to give it a more intricate look, but I decided that with such a big room and a baby on the way, creating the “perfect” faux wallpaper wasn’t going to be a great use of my time, so I decided to paint the stencil itself white and focus on a search for a good background color.
I used Pixlr and some rudimentary photo editing skills to erase the walls, add the wall stencil I had picked out, and try out a few different wall colors. After asking my husband for his opinion, we settled on a sagey color I pulled from the rug.

The Decor
After creating all of those themed nurseries, I realized I was loving the vibe of the whimsical nursery the most—a room with an English country home vibe, with a vintage feel and woodland creatures. I wanted to bring my adventures in England into my home and into my child’s life. I picked out my favorite furniture and decor items that fit that description—as well as incorporating some pieces I already owned, like the chair and the bookcase my dad made me—and used Canva to create a little collage of what the nursery might look like (uploading images of all of the products, removing their backgrounds, and “placing” them together in the room) .

I loved it all. The room felt absolutely perfect. I showed it to Chase, who approved the design, and went out in search of paint that evening, ready to start turning the design into reality!
That process ended up taking over two months, with a lot of twist and turns along the way! So, I’ll save that story for my next post.
Best,
Julia
Prior to the Blank Slate….
Just to embarrass myself, I’ll show you what we actually started with when we “started work” on the nursery back in January! We had some damage to our house from Hurricane Ida in August and had to empty out some rooms to get it fixed last fall. As a result, entire closets were piled into our guest room.
This first picture—where you can see the floor—isn’t even half as bad as it was back in December when we were getting the work done. With the little energy I had in my first trimester, I went through 50% of our possessions, filled bags with donation items and others with trash, and reorganized the rest as I put everything back where it belonged.
In late January, I finally finished getting the room back in order and by February 1st, it was in the “blank slate” state from the start of the blog.

Just looking at pictures of the state it was in stresses me out! It’s completely unrecognizable as the same room now.